Kawaii School Icons That Embroidery Machines Love
First Impression: Smiles That Translate to Stitches
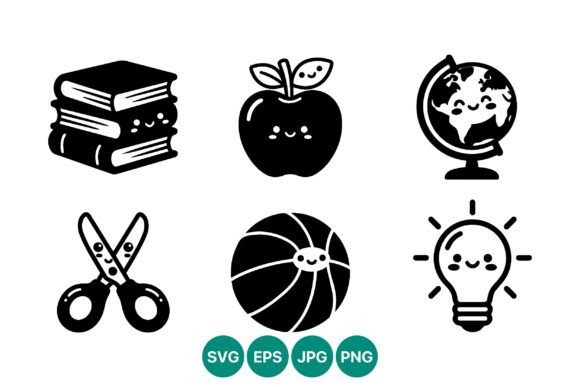
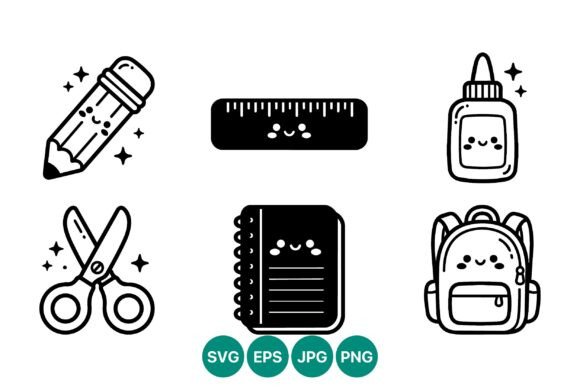
When I first opened the Cute Kawaii School Supplies Icons set, I immediately thought about how these little faces would behave under a needle. The black and white kawaii style gives you clean vector line art featuring a smiling pencil, scissors, ruler, glue bottle, notebook, and backpack. Each icon has simple facial expressions and tiny sparkles that make the set feel playful without being noisy. This is not an overly detailed illustration collection where fine lines collapse into a muddy mess during stitching. The flat vector line art approach actually works in favor of anyone planning to convert these into a machine embroidery design.
The mood is light, cheerful, and slightly nostalgic. These icons remind me of doodles in the margins of a school notebook, but with enough polish to feel intentional. For an embroidery designer or small business owner, the charm lies in the simplicity. A smiling glue bottle with sparkle accents reads clearly even at reduced sizes. The visual personality is approachable and gender-neutral, which matters when you are building handmade product lines that need broad appeal.
Where These Icons Naturally Belong
I ran through my mental checklist of client projects and craft business inventory, and the Cute Kawaii School Supplies Icons fit neatly into back-to-school merchandise, teacher appreciation gifts, and children's accessories. Picture a canvas tote bag with the smiling notebook and pencil stitched near the corner. That is a tote bag design that parents would grab for library trips or a teacher would carry proudly. The icons also work well on pencil cases, lunch bags, and small zipper pouches.
For baby embroidery and nursery decor, the glue bottle and ruler with tiny faces feel softer than standard school-themed graphics. A onesie with a single smiling scissors icon becomes a quirky personalized gift for a crafty parent. The backpack icon fits naturally on kindergarten gear, while the full set arranged as a border creates a playful pattern for a pillow cover or custom apparel piece.
Real Project: The Back-to-School Tote Test
Let me walk through a real scenario I have been considering. A client asked me to prepare a series of embroidered patch designs for a boutique back-to-school collection. The brief was simple: cute, gender-neutral, and stitch-friendly on medium-weight canvas. I pulled up the Cute Kawaii School Supplies Icons and started mentally mapping each icon to a 4x4 hoop area. The ruler and pencil fit horizontally on a standard patch blank. The glue bottle and notebook work better in a centered composition. The scissors need slight rotation to sit naturally.
When I think about how a customer would react to the finished product, the smiling faces do the heavy lifting. People connect with objects that have personality. A plain scissors icon is forgettable. A scissors icon with a tiny smile and sparkle becomes something a child wants to show off. That emotional hook matters when you are selling handmade product items at craft fairs or listing on Etsy. The Cute Kawaii School Supplies Icons give you that advantage without requiring complex color changes or layered stitching.
Stitching Reality: What Works and What Needs Caution
Here is the practical side that matters most. The flat vector line art style of these Illustrations translates well into running stitch and lighter fill stitch approaches. Because the designs are black and white linework, you have flexibility with thread color choices. A single-color stitch in navy or charcoal on a natural canvas background looks polished. On a dark fabric, a white or pastel thread version keeps the kawaii feel intact.
I would advise testing the sparkle details carefully. Those tiny star bursts around the icons add personality in the digital Graphics file, but under a needle, micro-details can get lost if the stitch density is not adjusted properly. Scale the sparkles up slightly before digitizing, or simplify them to two or three stitch points instead of trying to replicate every vector node. The facial features on the pencil and scissors are simple enough to hold their shape at 2 inches or larger. Below that, the eyes might blur together, so plan your hoop size accordingly.
Fabric and Surface Considerations
Textured fabrics like terry cloth or chunky knit will distort the fine line quality of these icons. I recommend smooth cotton, canvas, denim, or twill as your base. For sweatshirt embroidery, use a sturdy stabilizer and test whether the satin stitch around the edges of each icon puckers the fleece. A medium-weight cutaway stabilizer solves most of that. On stretchy fabric like jersey or ribbed knit, add a water-soluble topping so the stitches do not sink into the fibers and lose definition.
Dark fabric presents another challenge. The black and white nature of the source Graphics means you need to decide whether to invert colors or use a contrasting thread. A white thread version of the smiling backpack on a navy sweatshirt reads beautifully. On a black apron, the same design in bright yellow or mint green thread creates a completely different but equally effective look. Always test on scrap fabric first before committing to the finished product.
Thin and Delicate Materials
Thin fabric like lightweight cotton lawn or sheer curtains is not the best home for these icons unless you reduce the stitch density significantly. The design area can become stiff and the fabric may pull. I have learned this the hard way with similar embroidery project attempts. If a client insists on a delicate base, use a tear-away stabilizer and keep the icon size modest. The notebook and ruler shapes are long and narrow, which can cause distortion on thin materials if the stabilizer is insufficient.
Product Types That Showcase These Icons Best
After years of working with machine embroidery design assets, I categorize products by how well they hold stitched artwork. The Cute Kawaii School Supplies Icons perform best on structured items that lay flat and have some body. Here is my honest breakdown:
- Canvas tote bags: Excellent. The fabric weight supports clean stitch definition and the flat surface makes hooping straightforward.
- Patch blanks: Ideal. Each icon can become a standalone embroidered patch with a satin stitch border. The smiling faces make patches collectible.
- Aprons: Great for the pencil or notebook icon placed near the chest area. Use a medium-weight stabilizer.
- Pillow covers: Works well, especially with a repeating pattern of all six icons. The flat weave of standard pillow cotton holds detail nicely.
- Tea towels: Good choice for kitchen-themed adaptations. The glue bottle and scissors oddly fit a craft-room kitchen vibe.
- Caps and hats: Proceed with caution. The curved surface of a cap bill or crown can warp the longer icons. Test placement on the side panel rather than the front center.
- Baby clothing: Soft and adorable, but reduce stitch count and use a soft backing. The kawaii faces feel right at home on a baby bib or romper.
- Layered garments: Jackets with lining or quilted vests require extra care. Hooping through multiple layers can shift the alignment of the fine line details.
Commercial Use and Selling Considerations
For Etsy seller shops and small business owners, the Cute Kawaii School Supplies Icons offer versatile design assets that can become multiple product listings. One icon set can generate a tote bag listing, a patch set, a sweatshirt option, and a baby onesie collection. That is efficient inventory building. The kawaii aesthetic has staying power across seasons, and school-themed products peak reliably in late summer and early fall for holiday gift shopping.
Before selling finished items, confirm the commercial embroidery terms included with your purchase. The product description states the download includes a ZIP folder, but you need to verify whether the license allows digital embroidery file conversion for resale or only for finished physical products. This is a standard step I take with every digital product I source. Do not assume. Check the license, save the documentation, and keep records for your business files.
Branding Consistency and Customer Trust
When you build a craft business around a particular style, consistency matters. The Cute Kawaii School Supplies Icons have a unified look across all six designs. The faces are drawn in the same proportion, the sparkles appear in consistent clusters, and the line weight feels balanced. This means your handmade product line will look cohesive whether a customer buys a single patch or a full set of embroidered items. Cohesive branding builds customer trust and encourages repeat purchases.
From a printable mockup perspective, these icons also work well in product previews. You can create clean digital mockups showing the designs on different colored fabrics before you ever stitch a sample. This saves time and helps you gauge buyer interest before committing to full production runs.
Designer Notes for a Smooth Workflow
Here is my practical advice for anyone planning to use the Cute Kawaii School Supplies Icons in a real embroidery project. These are steps I follow regardless of the design source, and they apply here:
- Open the ZIP folder and review all files. Note the formats provided and confirm they are compatible with your digitizing software.
- Test the design on scrap fabric that matches your final product material. Same weight, same weave, same color family.
- Check thread color contrast by holding spools against the fabric in natural light. What looks good on screen may not translate.
- Review stitch density after the first test stitch. If the fabric feels stiff or shows puckering, reduce density in your digitizing software.
- Confirm hoop size before committing to a production run. Measure the stitched area and add margin for placement adjustments.
- Inspect small details like the sparkle clusters and facial features. If they blur, simplify them in the digitized version.
- Test the design in black and white mockups and also reversed for dark backgrounds. Both scenarios should look intentional.
- Compare results on light and dark fabric swatches. Keep both samples for client consultations.
- Use proper stabilizer for the specific fabric type. Cutaway for knits, tear-away for wovens, water-soluble topping for textured surfaces.
- Confirm licensing before selling finished items or converted digital embroidery file versions. Protect your business legally.
Final Verdict on Practical Use
The Cute Kawaii School Supplies Icons set earns its place in my design library because it solves a real need. I often need school-themed embroidery file options that are cute without being childish, and playful without being messy to stitch. These Illustrations hit that balance. The black and white line art approach gives me creative control over thread color, and the simple facial expressions add personality that customers notice and appreciate.
For custom apparel projects, the individual icons work as accent pieces. For small shop product lines, the full set creates a cohesive collection. For personalized gift orders, the smiling school supplies feel thoughtful and handmade. The design works as well on a pillow cover for a teacher's lounge as it does on a baby embroidery bib for a little one starting daycare. The versatility is what makes these Graphics valuable beyond a single project.
Stitch carefully, test thoroughly, and let the kawaii smiles do the selling. That is my honest take as someone who looks at every design through the lens of thread, fabric, and customer satisfaction. The Cute Kawaii School Supplies Icons pass the test.